
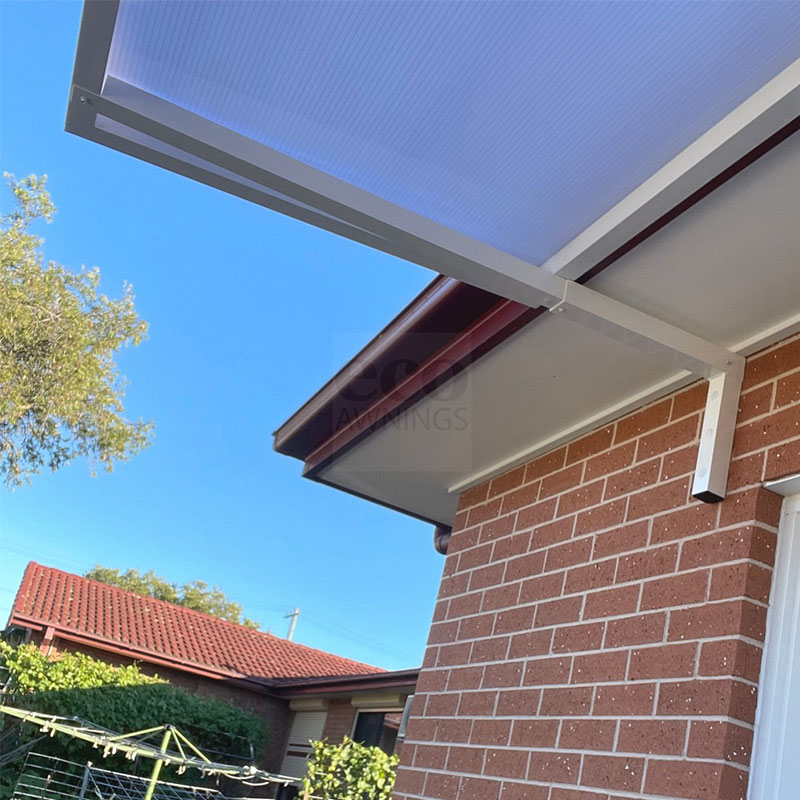
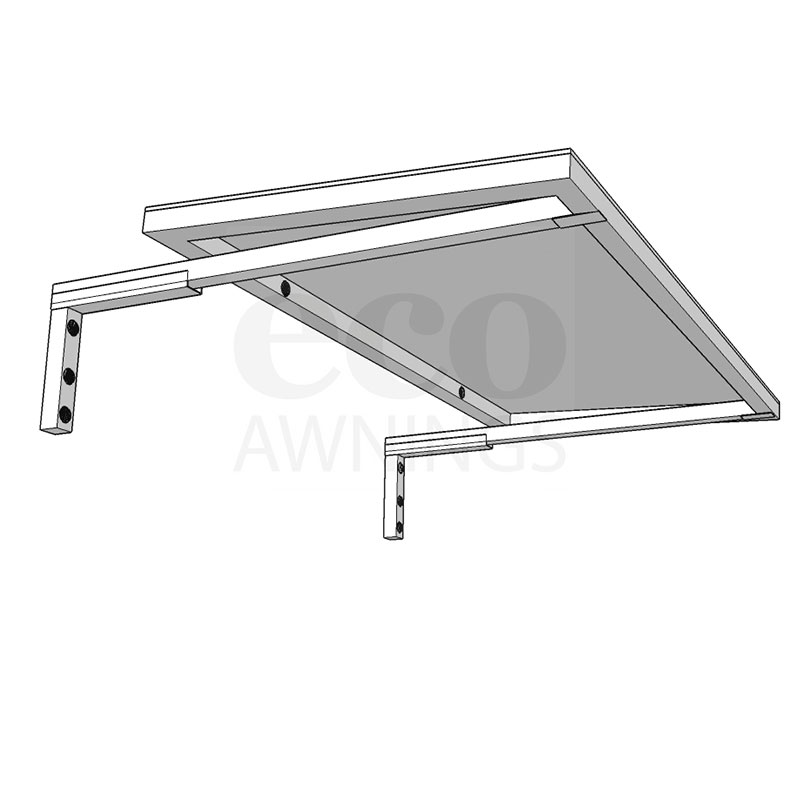
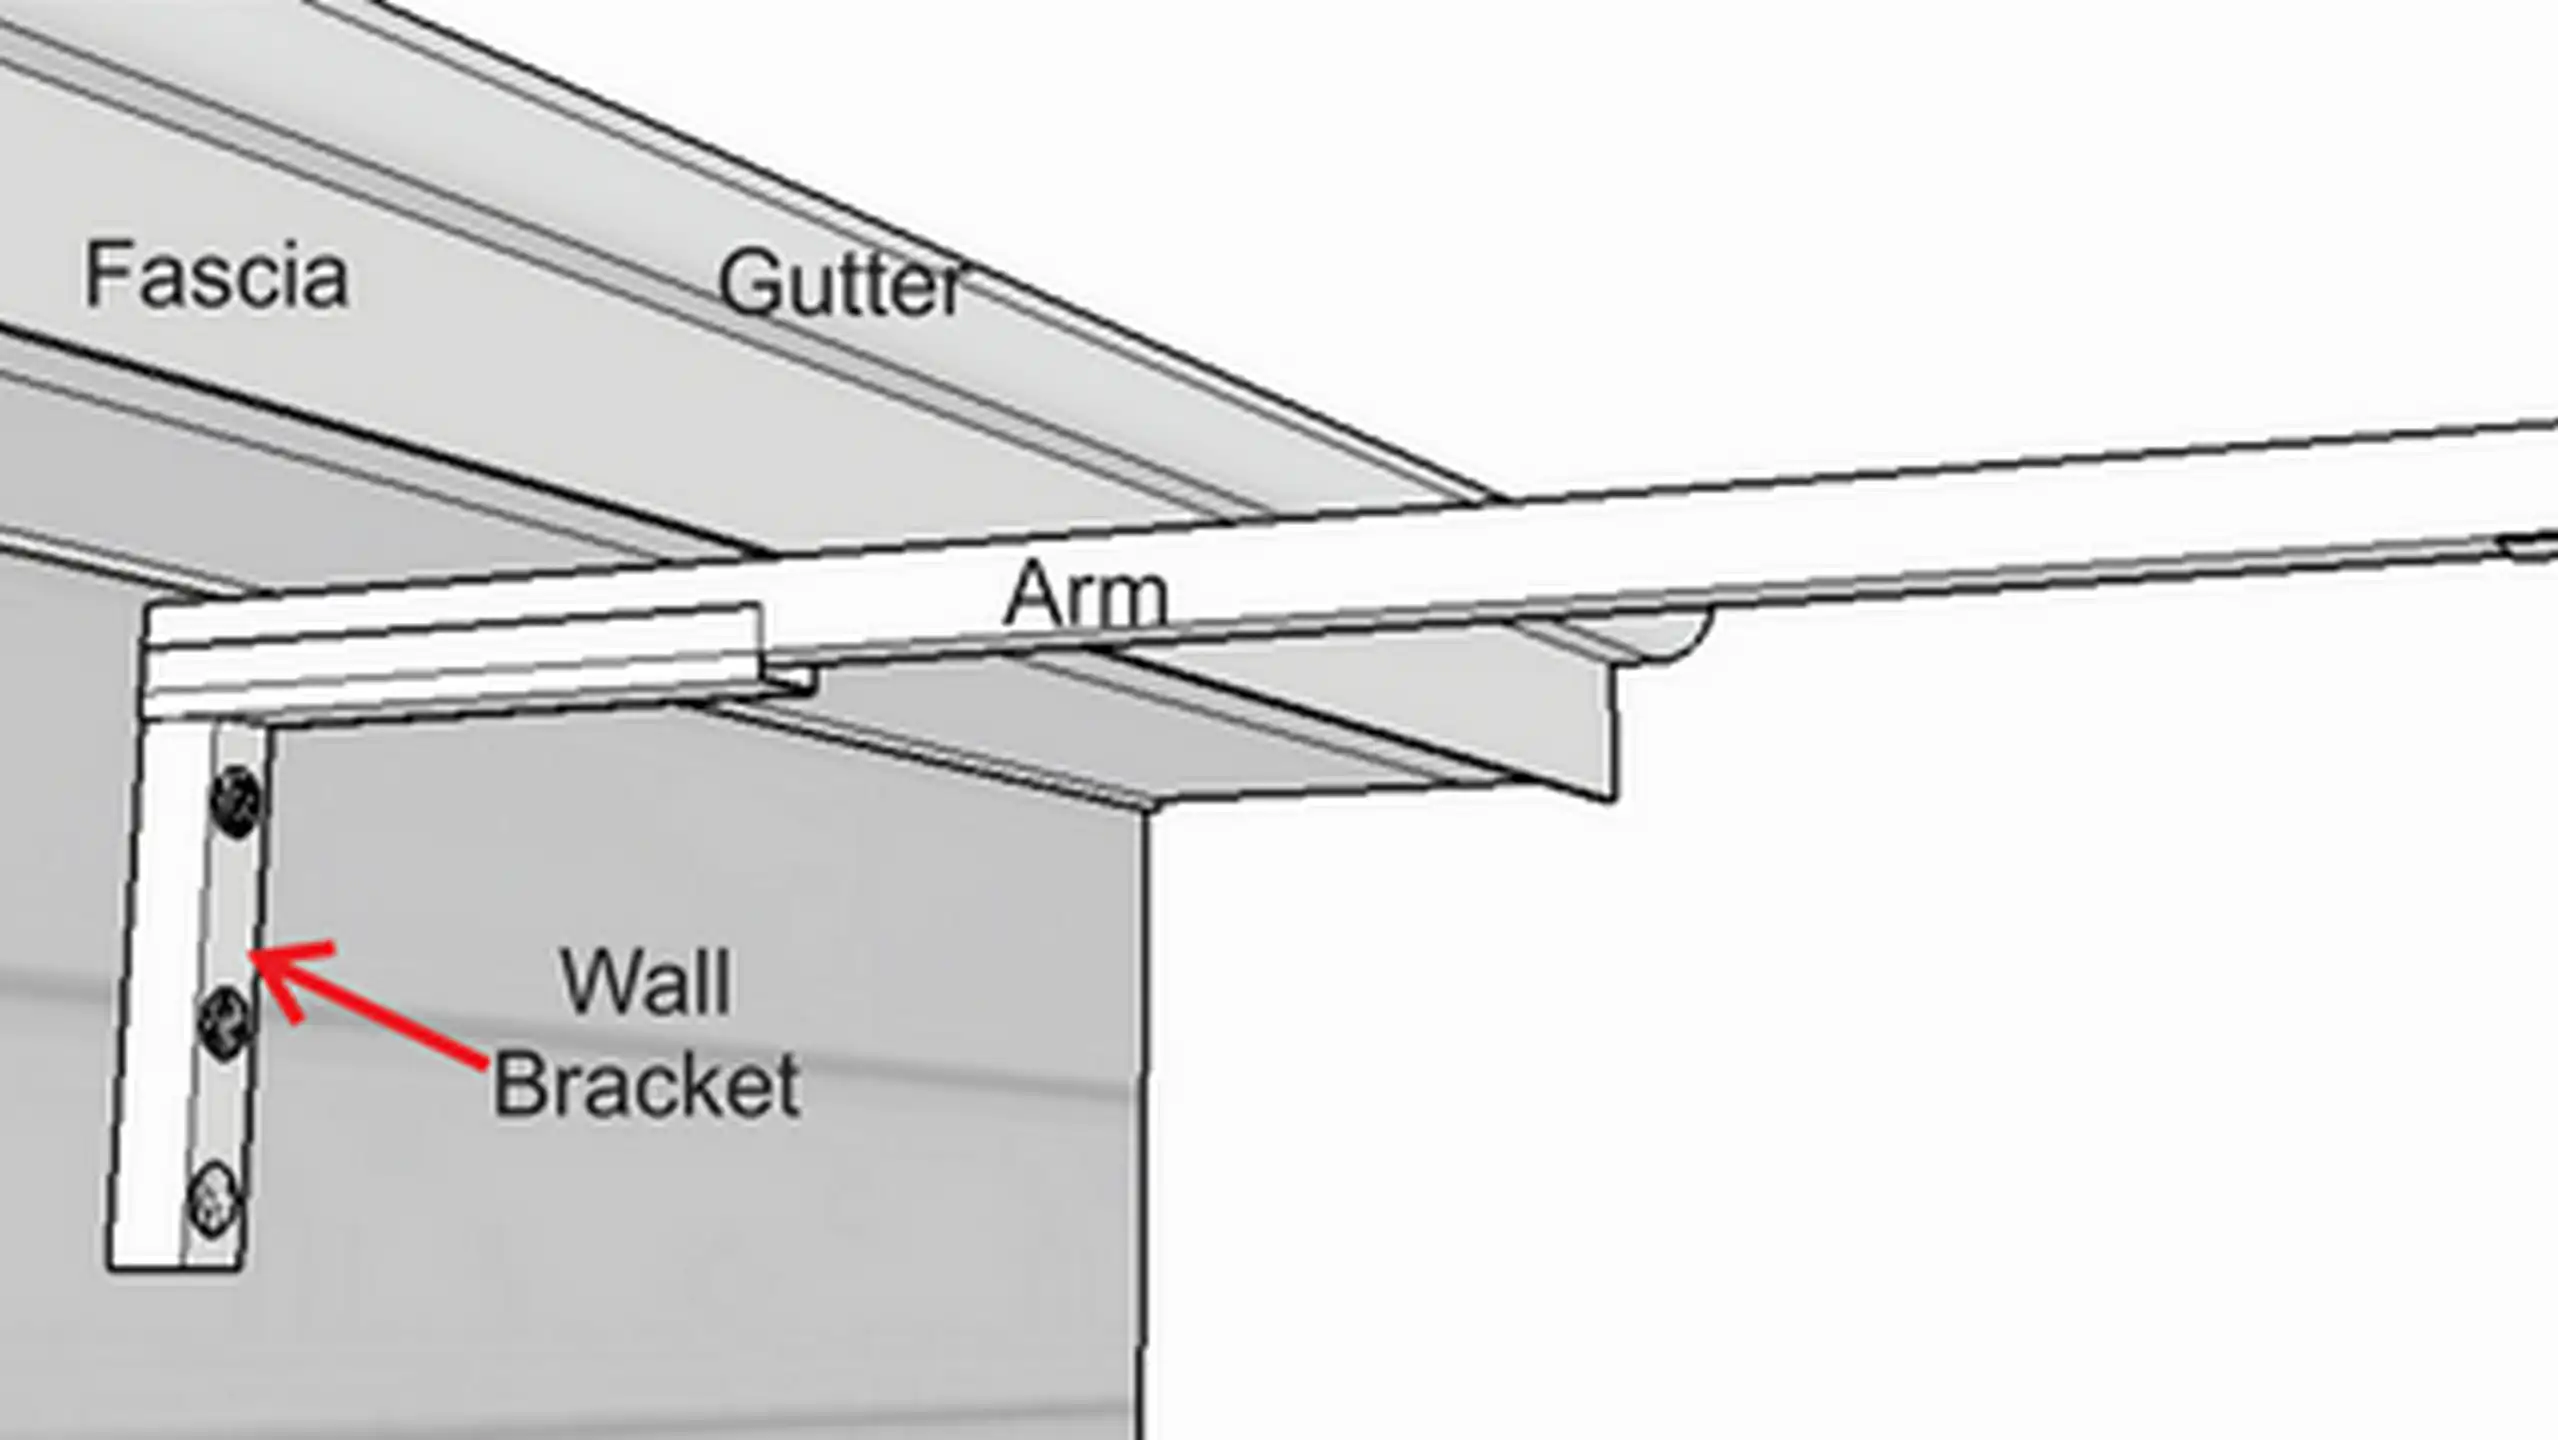
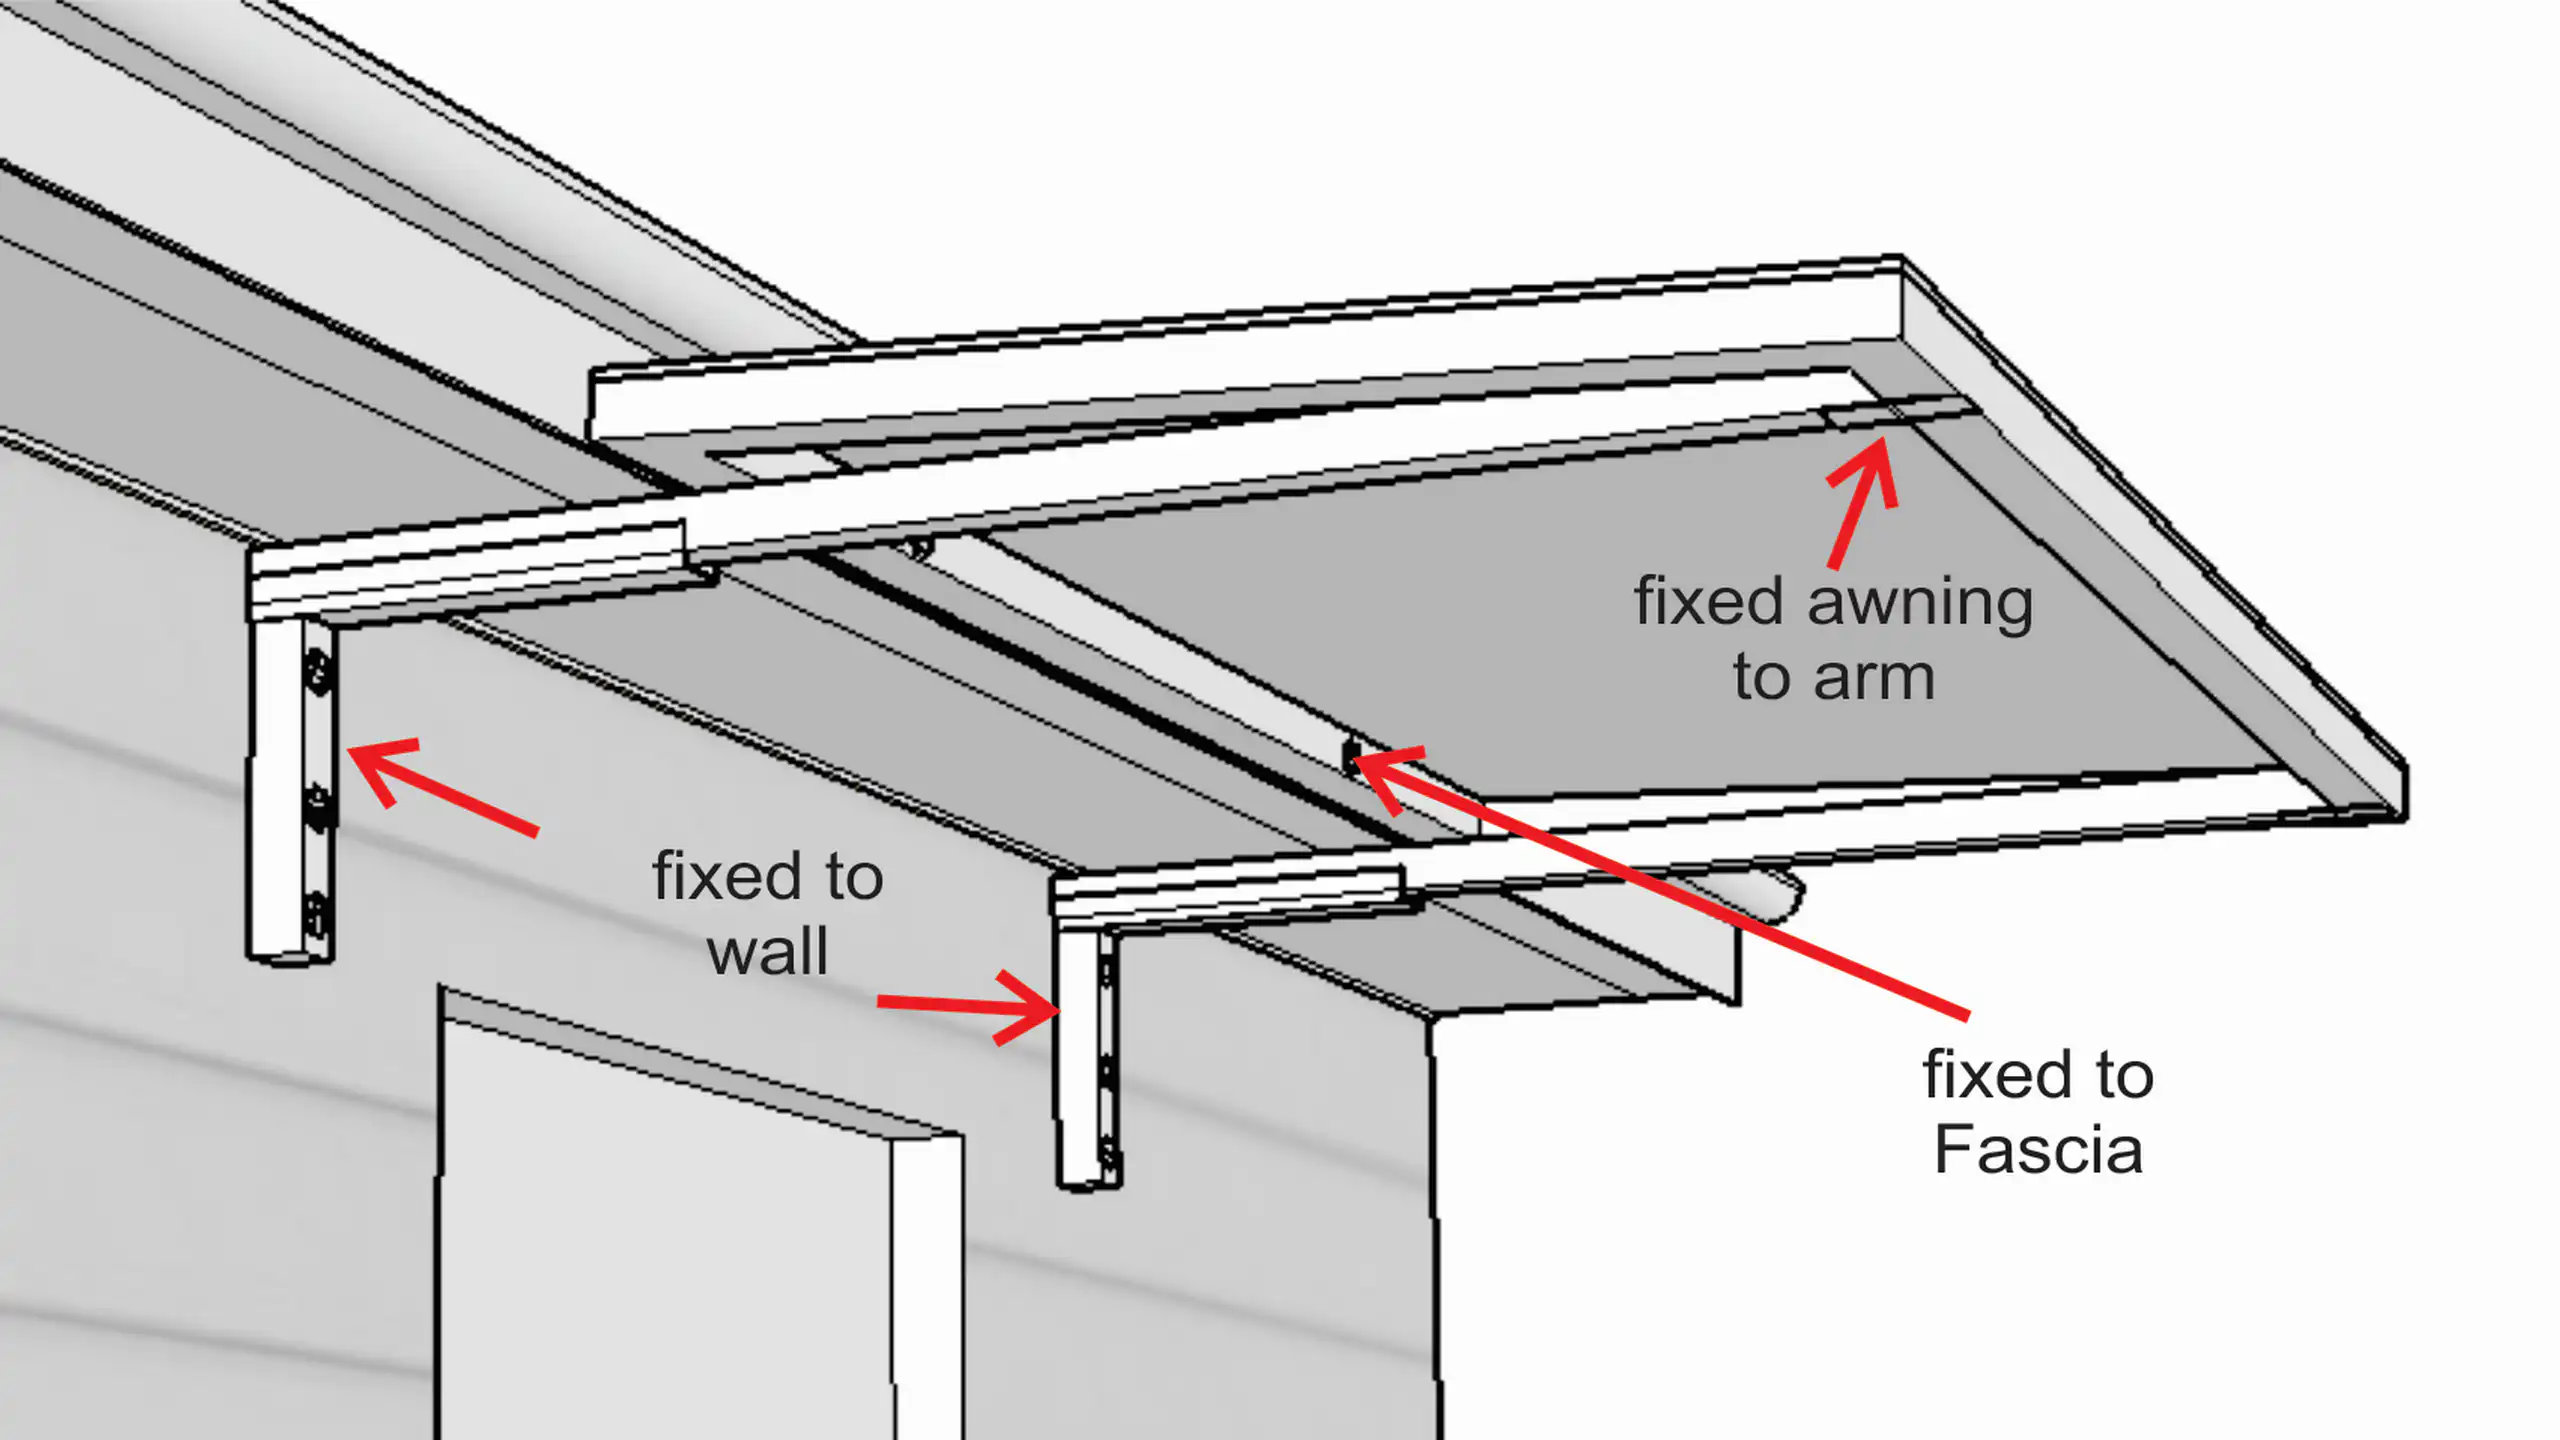
Wall-mounted brackets
hold support arms that extend under the eaves
Arms support the awning panel
keeping the design slim and minimal
Fits to the fascia below the gutter
for a neat, unobtrusive appearance

Awning mounts to both fascia and arms
for a strong, professional finish
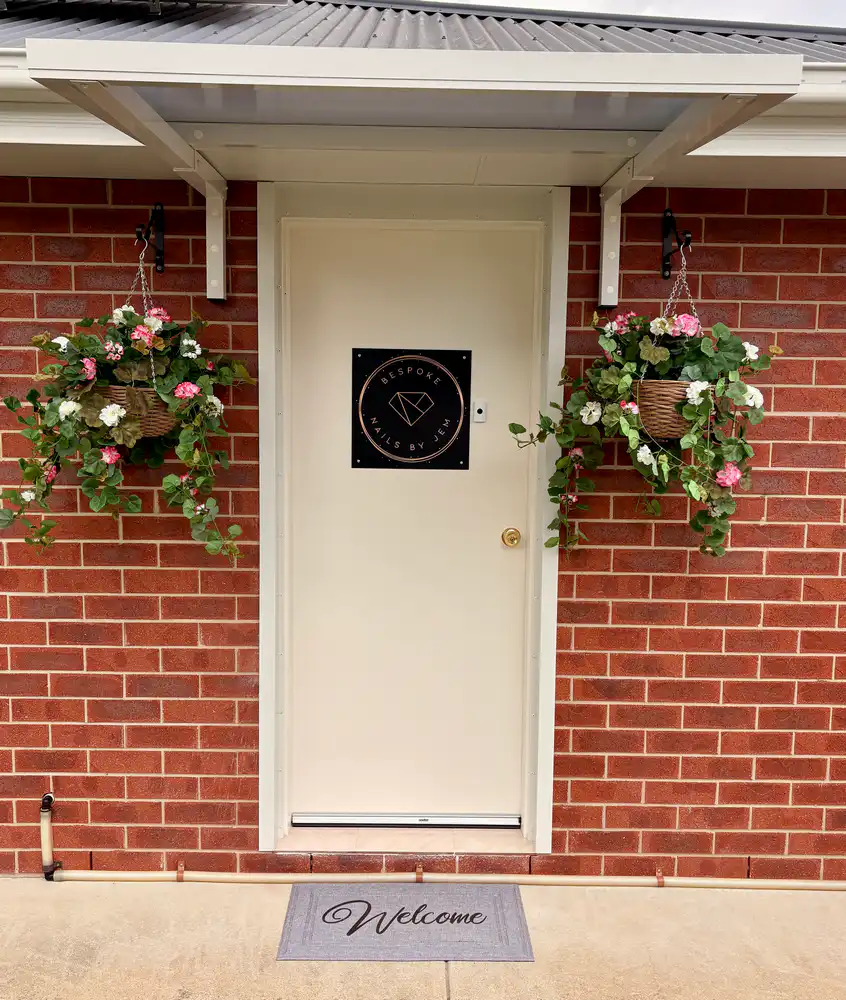
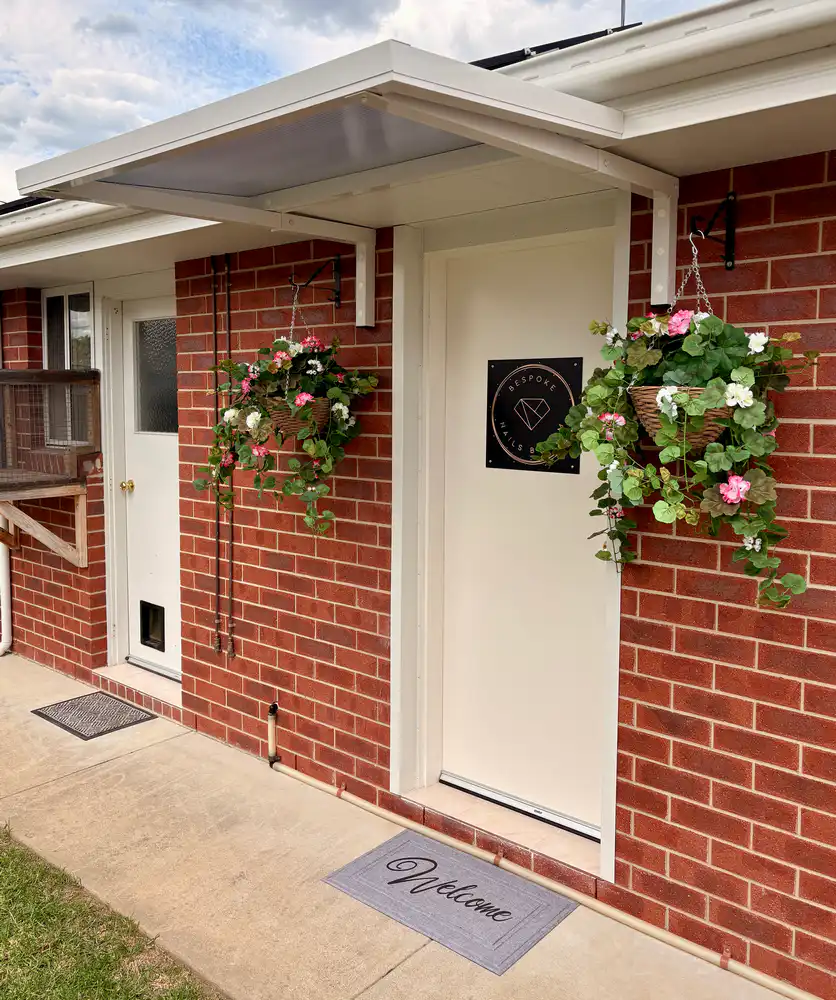
Custom-made
with up to 1065mm projection and widths up to 5 metres
Ready to Install — No Assembly Required


Premium 10mm twin-wall polycarbonate:
Sealed directly to the aluminium frame for strength and durability

High impact resistance:
Lightweight yet strong — ideal for awnings in high-wind areas
Double-sided UV protection:
Blocks 99.9% of harmful UV rays while allowing natural light through
Heat reduction properties:
Multiwall design helps lower heat buildup beneath the awning
Acoustic benefits:
Provides sound insulation, reducing noise transfer
Modern colour range:
Available in Solar White, Solar Silver, Grey, Bronze, Clear

Durable, long‑lasting protection:
Powder coating forms a thick, uniform layer on the finished awning, protecting against corrosion, scratching, UV damage, and weathering
Dulux-grade quality:
We use premium Dulux powders for excellent adhesion, colour retention, and fade resistance in outdoor environments
Precision application process:
Once the awning frame is fully fabricated, it’s cleaned, prepared, then coated with electrostatically charged powder before being heat-cured to create a hard, durable finish
Superior to traditional paint:
The thicker coating resists chipping, peeling, and wear better than liquid paint — ideal for outdoor applications
Wide colour & texture options:
Choose from the full Colorbond® palette, Dulux custom colours, and a variety of finishes including gloss, satin, matte,


